The Easiest Pickled Carrots
Do you like pickles? I do!
I’ll eat just about anything with that sharp, snappy flavor! And when prepared the way I’m going to show you today, they are EXTREMELY beneficial health-wise! Yes, it’s true. These easy peasy make-em-by-the-batch-or-one-jar-at-a-time pickles are a veritable feast of probiotics! What more excuse does one need to eat pickles?! They’re good for me?! And I can whip up a batch during nap time or even let my kids help?! SCORE!
The pickles I’m talking about here are lacto-fermented, which is a jazzy way of saying “full of good bacteria that preserves food and makes you super duper healthy”. We’re all used to eating yogurt or taking acidophilus, and with lacto-fermentation you take the benefits of a supplement one step farther: because it’s in food form, your body will recognize it as food and put it to use right away!
Throughout the process of making all the different kinds, I realized how really simple fermented pickles are to make. There’s no canner to fill and monitor. No jars to keep hot. No brine to cook. Just toss all the ingredients into a clean jar, fill with water, cover, and set on the counter for a week! And the kiddos can help!
One of my family’s favorite pickled snacks is pickled carrots, so here’s the easy recipe for you to try and enjoy too! (This also works beautifully for cucumbers, green beans, and even beets! Be creative and have fun.)
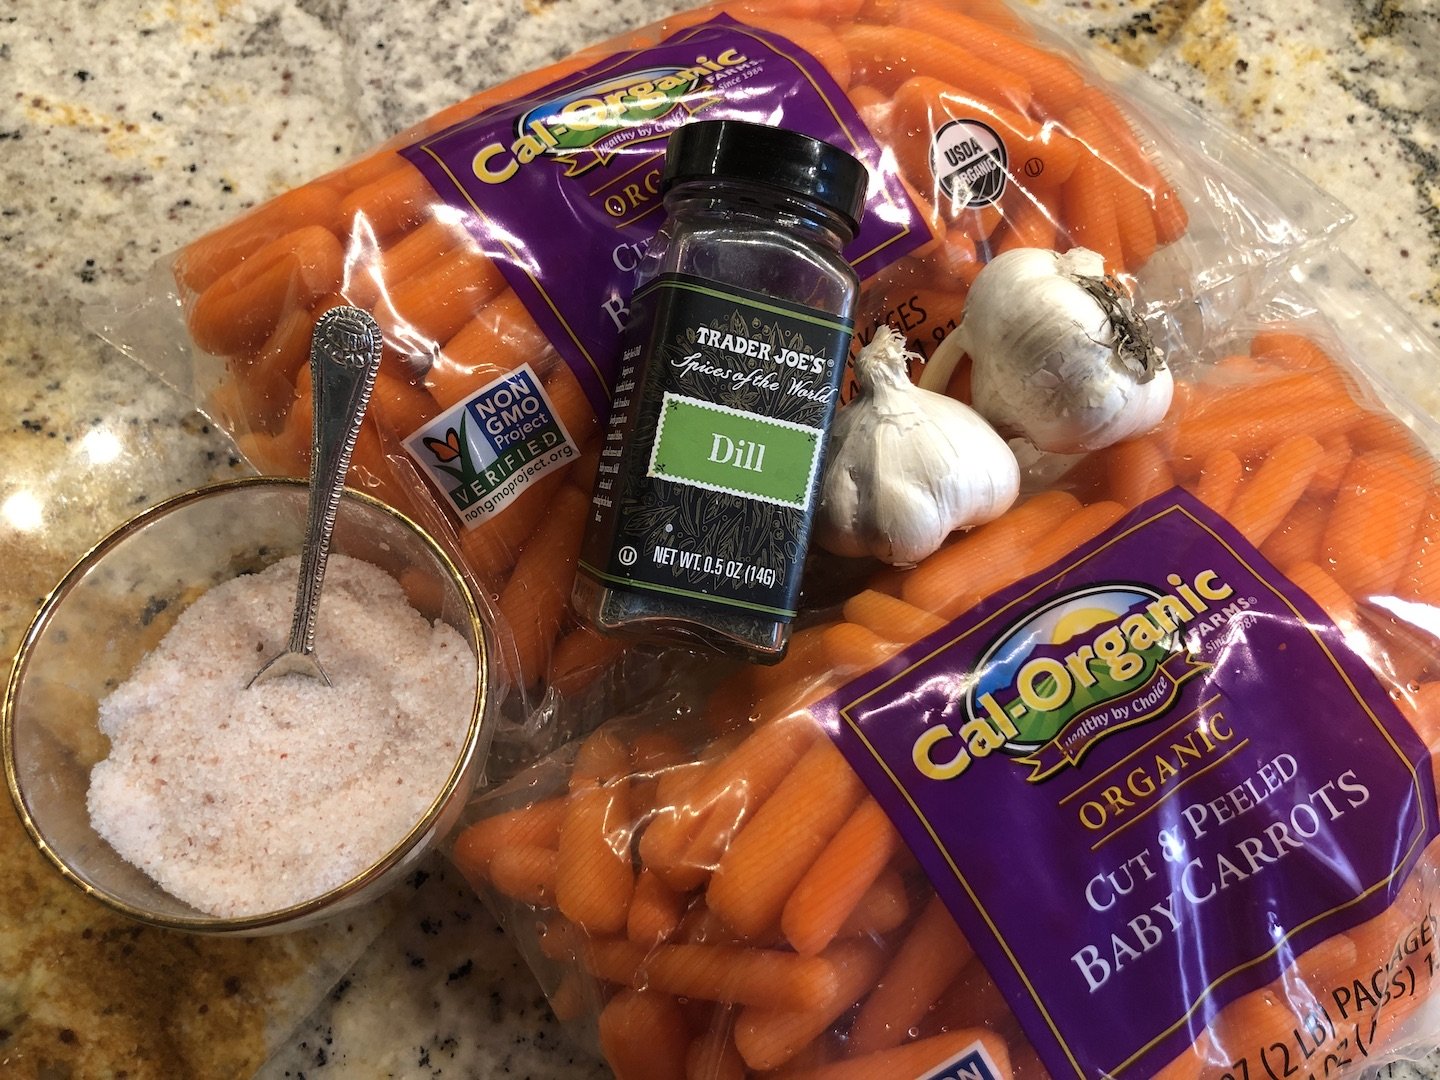
What you need:
Jars (they don’t even have to be “real” canning jars! Clean tomato sauce jars or any kind of jars you have on hand will work)
Carrots, peeled and cut into sticks—or make it super easy on yourself and use baby carrots!
Fresh garlic cloves
Dill–fresh or dried
Salt
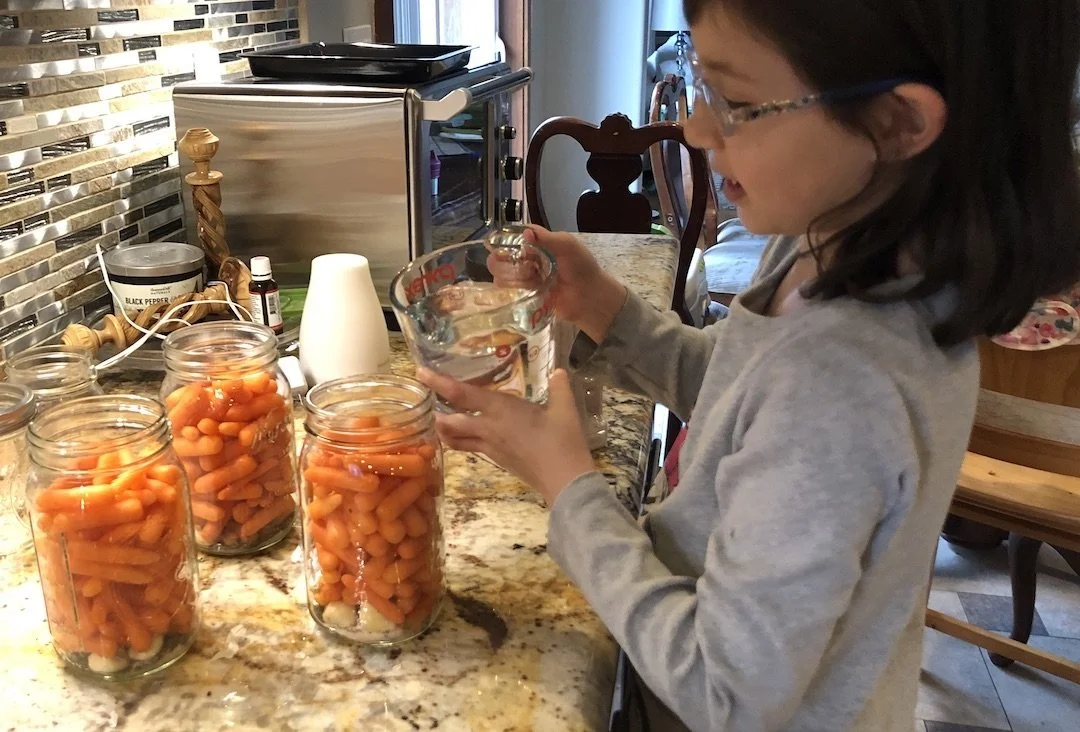
My daughter made these herself when she was seven!
How to do it:
For a quart-sized jar, toss in a few fresh garlic cloves (we use 3-5), 1/2 tsp. dried dill weed, and 1 TBSP salt.
Then pack it full with carrots (sliced, sticks, or baby carrots), and fill with filtered water. Put the lid on the jar and shake it up a bit to mix the salt into the water. Then open and peek inside to be sure all the carrots are under the water. If any carrots are above the water, just poke them back down with your finger.
Put the lid on finger tight, and you’re done! Set it on your counter for 5-7ish days or until it tastes sour enough for your liking (I usually let mine go more like 9 days, because I like them really sour). A word of wisdom here: sometimes in the process of fermenting, the jars will “whistle” a little or bubble some of the water out. I like to set them on a towel or paper towel just in case. :)
When they reach your preferred level of sourness, stick them in the fridge and they’ll keep forever! (Well, not around here…we eat them fast!)

Let me know if you try these! I hope you enjoy them as much as we do!